Updating a classic: Adding anti-twist to a Super Clamp

Everyone has a mafer/super clamp in their kit. They can be quite useful but I've found them a bit lacking at times and why I've been using Mini Super Clamps more often. However, in a effort to make things more functional and work to my needs rather than be limited by their design I've found I needed Arri style anti-twist on a mafer clamp for use with Kondor Blue Mini Lock quick releases.
After I did this on the mounting face of the clamp I realized there's some unused real estate on the other side of the clamp and I have all the tools to do something about that so I designed a guide to add a 1/4-20 hole and the 3mm anti-twist holes there as well. I'm calling this "V2" of the Anti-Twist Drill Guide for Mafer/Super Clamp

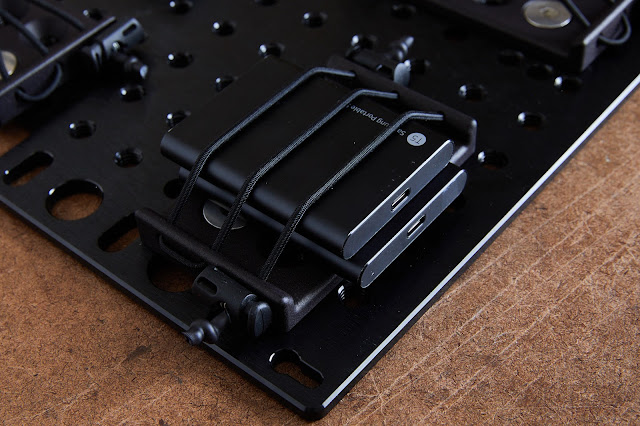
|
| The additional mounting point on the clamp will come in handy in some scenarios. |
To do either of these modifications you will need one of the guides I have designed, available from the links below.
I do offer a kit for the mounting face drill guide
that includes screws to secure it and the 3mm drill bit. But for the V2,
you're on your own.
If you print the drill guides use 4 walls to
make them a bit more robust so you can get more than one use from
it.
Tools needed:

Instructions for the V2:
- Ideally secure the clamp in a vise or just clamp it to secure surface.
- Align the guide on the clamp (the open end should go toward the opening of the clamp)
- Drill out the center hole with the no. 7 drill bit. You want to go a bit over 1/4in deep. You can measure first and put a tab of tape to act as a depth marker. It's important to drill perpendicular to the the surface to have a nice straight hole.

- Clear the chips and drill out the 4x 3mm holes. (These need to be about 4 mm deep)
- Using the tappered 1/4-20 tap (it's easier to align and keep perpendicular to the surface) Tap the 1/4-20 threads until it bottoms out. Again, be sure to keep it perpendicular.
- Remove the tap and clear the chips.
- Repeat with the 1/4-20 bottom tap (see below)

|
| Bottom tap (left) allows you to tap thread deeper into a non-through hole. |
- Clear the chips and you're done.
Now you can attach other accessories to the clamp.

This isn't a task for everyone but if you wanted to a bit crazy you could dual wield Camera Holsters!